






Common Banner Grommet Installation Mistakes: Over-Setting, Weak Hems and Poor Placement
 Common Banner Grommet Installation Mistakes: Over-Setting, Weak Hems and Poor Placement
A banner grommet usually fails at the boundary between metal and flexible material, so the visible damage can be misleading. A cracked flange may look like a hardware defect. A crescent-shaped tear may appear to prove that the vinyl was weak. A loose washer may be blamed on an operator. In production, these symptoms often come from a linked process error: the hole, hem, grommet, washer, die and press setting were never qualified as one assembly.
Correct installation does more than close a metal barrel. It creates a smooth, concentric roll that clamps the intended material stack without cutting it, distributes load through a reinforced area and leaves enough distance between the hole and the banner edge. Over-setting destroys that balance by crushing the assembly. A weak hem gives the grommet too little structure to hold. Poor placement concentrates tension exactly where the banner is least able to carry it.
Read the Failure Pattern Before Changing the Hardware
Every damaged hole contains evidence. The direction of the tear, the condition of the rolled barrel and the shape of the washer show whether the primary problem was cutting, crushing, movement or load concentration. Replacing the grommet with a heavier one without reading that evidence can make the next failure faster because a harder or wider part may apply even more pressure to the same weak structure.
| Observed condition | Most likely cause | What to verify first | Corrective direction |
|---|---|---|---|
| Flange is dished, distorted or deeply imprinted | Excessive press stroke, tonnage or incorrect upper die | Set height, die contact and sectioned barrel geometry | Reduce stroke to the validated window and use matched tooling. |
| Radial cracks start at the punched hole | Ragged, undersized or off-center hole; substrate embrittlement | Punch sharpness, hole diameter and edge quality | Restore the cutting process before changing press pressure. |
| Grommet rotates or rattles | Under-setting, barrel too short or variable material thickness | Compressed stack thickness and completed roll | Match barrel length and lock a minimum set condition. |
| Crescent tear points toward the banner edge | Insufficient edge distance, weak hem or uneven tie-down load | Hole centerline, reinforcement width and mounting geometry | Move the centerline inward and strengthen the load path. |
| Washer tilts or one side of the roll is open | Misalignment, eccentric punch or mismatched die | Part orientation and upper/lower tool concentricity | Realign the tooling and control part presentation. |
| Finish chips around the flange | Excessive deformation, contaminated die or unsuitable coating | Die radius, surface cleanliness and post-set adhesion | Protect the visible surface and validate coating after setting. |
Mistake 1: Over-Setting the Grommet
Over-setting occurs when the installation stroke continues after the barrel has formed the required roll and the flange has seated. The extra movement does not create useful holding force. It collapses the flange, thins the rolled edge, drives the washer into the banner and can shear the coating or reinforcement scrim. On thin PVC, the damage may be almost invisible until a wind cycle opens the crushed ring around the hole.
A production grommet machine press should be controlled by validated shut height, stroke or force rather than by the operator’s impression that “tighter is safer.” Air pressure alone is not a complete setting specification because machine leverage, die geometry, stack thickness and material springback all change the final joint. The target is a stable formed shape, not the highest possible gauge reading.
How to recognize an over-set joint
- The front flange becomes concave, wavy or oval instead of remaining flat.
- The washer embosses a sharp circular groove into the back of the hem.
- The barrel roll is paper-thin, split or folded back against itself.
- The banner coating turns white, wrinkles or extrudes outward around the metal.
- Decorative plating cracks at the radius or transfers onto the die.
The correct response is to section several installations across the proposed setting window. Measure the final height, inspect the roll at four quadrants and perform pull-out testing on the actual banner stack. Choose the lowest setting that produces a complete, stable roll with no rotation. More compression after that point reduces the safety margin.
Mistake 2: Expecting a Weak Hem to Carry the Load
The grommet cannot create strength that does not exist in the surrounding banner. A single layer of thin vinyl, loosely woven fabric or open mesh provides little resistance to bearing stress. Once tension starts to enlarge the hole, the flange shifts, the load moves to one side and the tear accelerates. This is why a visually perfect installation can still pull out at a force far below the project requirement.
Guides explaining how to add grommets to fabric often focus on the setting action and omit the load path. For banner production, the fold, reinforcement tape, weld or sewn webbing is part of the joint. It must extend far enough beyond the flange to distribute force into undamaged material. A narrow strip that ends beside the hole merely creates another stress boundary.
Build the hem for the substrate
For reinforced vinyl, a correctly welded or bonded fold usually performs better than a loose fold because the layers act together. The adhesive or weld must remain continuous through the grommet zone. Trapped air, contaminated surfaces and low-temperature welding produce pockets where the layers separate under load. The grommet then clamps the top layer while the lower layer slips.
Woven polyester, canvas and other textiles need control of yarn movement. A folded hem, backing patch or webbing spreads force across more yarns. Mesh needs special attention because the open construction reduces continuous contact under the flange. Wide reinforcement tape or webbing should bridge the open cells, and the final barrel length must match the added thickness.
Do not place the hole through the edge of a reinforcement tape, seam allowance or incomplete weld. The joint should sit inside a uniform stack. If the thickness changes beneath one side of the flange, the barrel rolls unevenly and the thin side becomes the first tear path.
Mistake 3: Placing Grommets Too Close to an Edge or Corner
Placement is a structural variable. The flange needs enough material outside the hole to resist pull-through, while the space between adjacent grommets determines how load is shared along the hem. A hole placed too close to a cut edge leaves a short ligament that can split in one pull. A corner hole placed without extra reinforcement receives tension from two directions and usually becomes the most highly loaded point on the banner.
When operators ask how to place a grommet, the useful answer begins with the centerline, not the visible edge of the metal. Define the hole-center distance from the finished banner edge, the allowable positional tolerance and the relationship to folds, seams and artwork. Measuring to the outside of the flange creates inconsistent hole centers whenever flange size changes.
Spacing must match the mounting system
Closer spacing can improve load distribution, but only when each tie point receives comparable tension. If every other grommet is unused, the installed pattern no longer matches the design assumption. Extremely tight bungees at a few points also defeat a dense hole pattern. The production drawing should therefore identify the mounting method and intended tie-point use, not only the number of holes.
Corners should receive a larger reinforced area, controlled radius and sufficient distance from both edges. Avoid locating a hole over a fold termination, banner notch or welded joint intersection. These geometric discontinuities concentrate strain. For wind-exposed banners, validate corner and edge specimens separately because average straight-edge performance does not predict corner life.
Mistake 4: Punching the Wrong Hole
The punched hole guides the barrel and determines how much material remains under the flange. An oversized hole removes bearing area and allows the grommet to wander. An undersized hole can bunch material into the roll, increase setting force and split the barrel. A ragged hole contains notches that behave like pre-cut tear starters.
A hand grommet puncher is suitable for sampling or low-volume work only when it remains sharp, perpendicular and supported by the correct cutting surface. Side loading creates an elliptical hole. Repeated blows can shift the punch between impacts and leave a stepped edge. In production, the locating fixture must prevent the banner from creeping while the hole is cut.
The cutting diameter of a grommet punch tool should be specified against the actual barrel outside diameter and the behavior of the substrate. It should not be selected from the finished inside diameter printed on a retail package. Flexible vinyl can recover after cutting, while woven fabric can open as yarns move. Approval therefore requires measuring fresh holes and installed sections rather than relying on the nominal punch marking.
Heat-cutting is not automatically safer
A hot tool may seal synthetic fibers, but excessive temperature creates a hard, brittle rim. That rim can crack under setting pressure or cyclic bending. It can also build residue on the cutting tool and gradually reduce hole quality. Heat-cut parameters need the same controls as mechanical punching: temperature, dwell, cleaning frequency, diameter and edge acceptance.
Mistake 5: Using Unmatched Tools, Dies or Components
A general grommet tool kit can be useful for prototypes, repairs and field installation, but it is not proof that a grommet is ready for repeatable production. The setter profile must support the visible flange, guide the barrel and roll it into the selected washer without scraping the finish. A die designed for another brand or nominal size may contact the wrong radius even when the parts appear to fit.
The same rule applies to any grommet tool for fabric: compatibility must cover the complete stack, not only the metal diameter. A tall stack may need a longer barrel and a die with more forming travel. A soft coated fabric may need a polished support face to prevent imprinting. Spur washers require alignment and penetration control that a flat washer die does not provide.
Mixing grommets and washers from different series is another common error. A loose washer hole provides poor radial support; a tight hole can shave plating or obstruct the roll. Variations in temper, barrel wall thickness and washer hardness also change the setting window. Use a qualified component set and lock the purchasing specification to drawings, tolerances and approved samples.
Mistake 6: Under-Setting, Tilting or Reversing the Assembly
Over-setting receives more attention, but under-setting causes just as many loose or rotating grommets. The barrel must roll far enough to retain the washer and stabilize the material stack. If it remains partly open, handling and vibration increase the clearance. The metal then frets the banner coating and gradually enlarges the hole.
Instructions on how to insert grommets should define part orientation, washer side and material-stack direction before the press cycle begins. A reverse-loaded washer, nested double washer or tilted grommet can pass a quick front-side visual check. A poka-yoke feed fixture, lower-die nest and back-side camera or inspection station prevent these errors more reliably than operator memory.
Tilting typically comes from a sloped hem, a hole that is not centered over the lower die or a press ram that is not square. One side of the barrel begins rolling early while the opposite side remains open. The correction is mechanical alignment. Increasing pressure only crushes the completed side and leaves the geometry asymmetric.
Mistake 7: Treating Installation as an Operator Skill Instead of a Controlled Process
Experienced operators are valuable, but repeatability must reside in the process. A work instruction for attaching grommets should state the approved component codes, punch, die set, hole centerline, stack orientation, press setting, first-piece checks and reaction plan. “Press until tight” is not an acceptable production parameter.
Material thickness can vary across coated vinyl rolls, welded hems and reinforcement tape overlaps. Tooling wears. Adhesive contaminates punches. Presses warm up and air pressure fluctuates. A robust process either tolerates these changes or detects them before defective banners continue downstream. First-piece approval should be repeated after tool changes, material-lot changes, long stops and maintenance.
Useful production records include final set height, hole-position measurements, periodic section photographs, pull-out results and defect codes. Tracking “grommet failure” as one category hides the distinction between cracked barrels, weak hems, wrong positions and incomplete rolls. Separate defect codes make corrective action faster and reveal whether the process or purchased part changed.
Repairing a Mis-Set or Torn Grommet
A bad installation should not be hammered again blindly. Re-striking an over-set joint increases cutting. Re-striking a tilted joint can split the barrel. Before deciding on repair, determine whether the banner material beneath the flange remains intact and whether the original hole can still support load.
Advice on how to remove grommets must prioritize protection of the substrate. Support the flange, cut or peel the rolled barrel in controlled sections and lift the washer without pulling it through the hole. Avoid prying against the visible banner face. Operators should wear suitable eye and hand protection because cut metal edges can be sharp.
Never install a same-size replacement into a stretched, notched or enlarged hole and call the repair complete. Use an engineered reinforcement patch with validated bonding or welding, then move to a larger qualified component only if enough edge distance remains. For a critical outdoor banner, replacement of the affected panel or banner is often more reliable than a field patch. Production rejects should be analyzed, not hidden by cosmetic rework.
A Production Control Plan That Prevents Repeat Failures
The control plan should separate incoming-part checks, process checks and finished-assembly tests. Dimensions confirm that the components match the drawing. Visual checks confirm that the press formed them correctly. Mechanical tests confirm that the banner system carries the required load. No single check replaces the other two.
| Control point | What to measure | Recommended timing | Reject condition |
|---|---|---|---|
| Incoming grommet and washer | Inside diameter, barrel length, flange, wall, washer fit, finish | Each lot under the agreed sampling plan | Out-of-tolerance dimensions, burrs, corrosion, cracks or mismatched finish |
| Punched banner | Hole diameter, roundness, edge quality, centerline and spacing | First piece and periodic checks by lane or tool | Ragged edge, double strike, off-center hole or insufficient edge distance |
| Installed joint | Final height, concentricity, flange seating, roll and washer stability | Start-up, after adjustments and at defined intervals | Rotation, split roll, tilted washer, substrate cutting or finish damage |
| Sectioned sample | Roll symmetry, wall thinning, trapped material and stack compression | Qualification and periodic destructive audit | Incomplete roll, one-sided collapse or sharp metal contact |
| Mechanical assembly | Pull-out load, displacement and failure mode | Preproduction, material changes and lot audits | Result below specification or failure at an unintended weak point |
| Outdoor program | Cyclic loading and relevant corrosion performance | Design validation and controlled requalification | Progressive loosening, hole growth, cracking or unacceptable corrosion |
Pull-out testing must record the failure mode as well as the peak force. A high number obtained by tearing the entire hem may indicate that the grommet joint is adequate, while a lower number caused by a loose washer points to installation. Cyclic loading is essential for outdoor and frequently handled banners because small movement that survives one pull can grow over thousands of cycles.
How BC New Material Supports Reliable Banner-Grommet Production
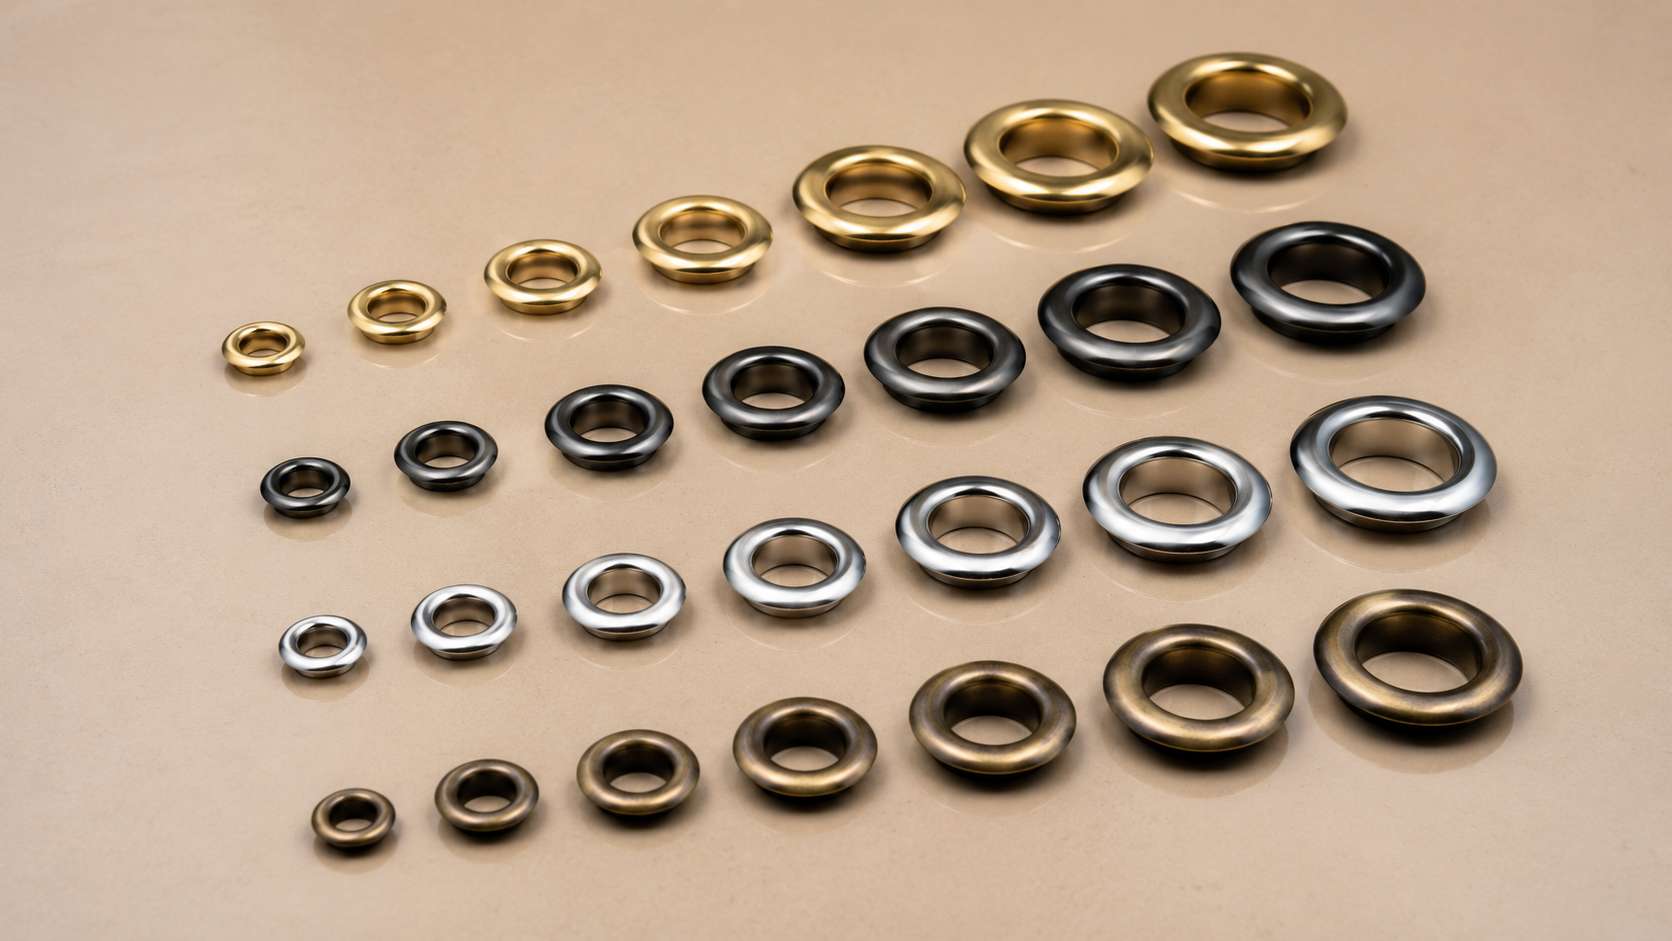
BC New Material supplies finished banner grommets and develops the component around the customer’s actual substrate and setting process. The project begins with the banner type, final compressed hem thickness, reinforcement method, hole centerline, mounting hardware and service environment. These inputs determine the part structure more reliably than choosing by nominal inside diameter alone.
Customization can cover inside diameter, flange diameter, barrel outside diameter, barrel length, wall thickness, rim shape, one-piece or washer-backed construction and plain, toothed or spur-washer geometry. Material options and surface treatments are selected for the appearance, corrosion exposure and forming requirement. Colors and finishes can be developed for brand programs, while edge smoothness, coating adhesion and post-setting appearance are confirmed on production-intent samples.
The engineering service includes drawing review, tolerance definition, sample development, dedicated tooling and trial setting on the customer’s real material stack. When a customer uses an existing press, BC New Material can match the component design to the relevant tooling interface and help define the installation window. When new tooling is required, the die profile is developed with the finished roll, flange protection and washer behavior in mind.
Quality control can be aligned with the project through dimensional inspection, material and finish verification, set-section review, pull-out testing, cyclic testing and corrosion requirements. This approach is especially important for multi-site banner converters: a locked component specification and a measurable set condition reduce the variation that appears when each plant relies on a different operator habit.
JSW20 for Near-Non-Magnetic, Corrosion-Resistant Finished Components
For projects that require both low magnetic response and strong corrosion performance, BC New Material offers finished grommets and customized components made from patented JSW20 austenitic stainless steel. The benefit is verified on the formed part, not assumed from the raw metal. After drawing, punching and rolling, JSW20 can retain ultra-low magnetic permeability, with relative permeability as low as approximately 1.003 under applicable test conditions.
This near-non-magnetic performance helps finished banners, textile displays, bags and mixed accessory products pass needle-detection workflows with fewer magnetic false alarms. It is also useful where ordinary austenitic stainless steel becomes detectably magnetic after cold forming. BC New Material supplies the JSW20 finished component rather than raw stainless-steel coil.
JSW20 does not trade away corrosion resistance to achieve low magnetism. It provides resistance in chloride-containing environments, and its corrosion performance is slightly better than ordinary 316 stainless steel in BC New Material’s comparative test context. Its price is close to 316, which makes it commercially practical when buyers need near-non-magnetic behavior, environmental compliance and outdoor durability in the same specification.
Relevant project documentation can include the applicable patent, RoHS, REACH, nickel-release and OEKO-TEX or Intertek-supported reports according to the product, finish and agreed compliance scope. Documentation should be matched to the supplied finished part and intended market; it should never be treated as a blanket substitute for project qualification.
What to Send a Grommet Supplier Before Sampling
- Banner construction: substrate type, weight, coating, weave or mesh openness, fold layers, reinforcement tape and compressed thickness.
- Hole and layout: target inside diameter, hole centerline, edge distance, spacing, corner geometry and positional tolerance.
- Mounting condition: hooks, rope, cable ties, bungees or rigid fasteners, including expected tension and movement.
- Service environment: indoor, general outdoor, coastal, chloride-bearing, industrial or frequently cleaned, plus target life.
- Installation equipment: press type, available stroke or force control, current punch and die interface, and target cycle rate.
- Appearance: base metal, color, gloss, visible-face requirements and allowed marks after setting.
- Validation: pull-out force, cyclic load, corrosion, magnetic permeability, restricted substances and sampling requirements.
Focused FAQ
How tight should a banner grommet be?
It should be tight enough that the washer does not rotate and the barrel forms a complete, concentric roll. The flange must remain flat and the substrate must not be cut or deeply embossed. Final set height and section geometry provide a better standard than operator feel.
Can extra press pressure improve pull-out strength?
Only until the correct roll and seating condition is reached. Additional pressure after that point crushes the hem, thins the barrel and increases the chance of cutting. Pull-out strength should be improved through reinforcement, flange area, washer design and correct placement, not uncontrolled compression.
How far should a grommet be from the banner edge?
There is no universal distance because flange size, substrate, hem construction and load differ. Define the distance from the hole center to the finished edge, then verify it by pull-out and cyclic tests. Corners generally need more reinforced area than straight edges.
Why do grommets pull out even when the metal is undamaged?
The surrounding banner is usually the weak link. An unsupported single layer, incomplete weld, narrow reinforcement strip, oversized hole or insufficient edge distance can tear before the grommet deforms. The complete assembly must be redesigned.
Can a damaged grommet hole be reused?
Not without evaluating the remaining material. A stretched or notched hole cannot reliably hold the same component. A qualified reinforcement repair or a larger engineered grommet may work when enough edge distance remains, but critical outdoor products are often safer to replace.
What does BC New Material customize for banner projects?
BC New Material customizes dimensions, flange and barrel geometry, wall thickness, washer structure, materials, colors and finishes. It also supports samples, tooling, installation-window development, dimensional control, pull-out and cyclic testing, corrosion requirements and project-specific documentation.
Why choose JSW20 instead of ordinary 316 stainless steel?
Choose JSW20 when the finished formed component must remain near-non-magnetic, support needle detection and resist chloride-containing environments at a price close to 316. Under BC New Material’s comparative test context, its corrosion performance is slightly better than ordinary 316, while post-forming magnetic stability is the defining advantage.
#Banner Grommets, #Outdoor Banner Hardware, #Indoor Display Hardware, #Custom Grommets, #Stainless Steel Grommets, #Non Magnetic Stainless Steel, #JSW20, #Banner Manufacturing, #Corrosion Resistance, #BC New Material